This article explains how to create new store pages. If your site is multilingual, remember to create the store pages in both French and English.
** Individual Stores pages that you create will automatically be added alphabetically to the Store Directory on the Stores page.
1. In the left-hand admin menu, go to Stores > All Stores
2. Hover over The Sample Store and when the menu appears below, click on the “Clone” link to make a copy of the Store page.
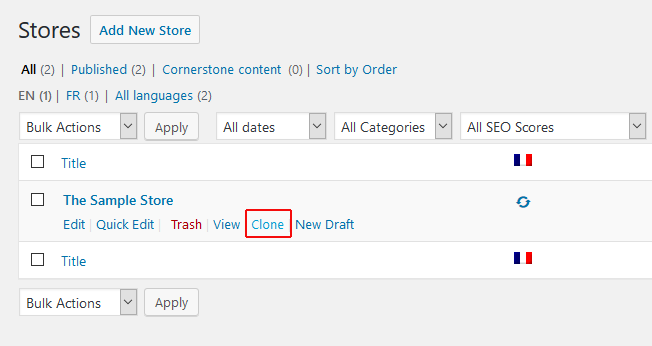
3. Then click the “Edit” link for the new “Copy of the Sample Store – Draft” page.

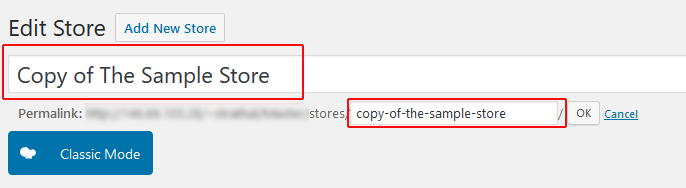
4. Rename the page: On the new page, edit the title to the new store name, then edit the permalink with the store name.
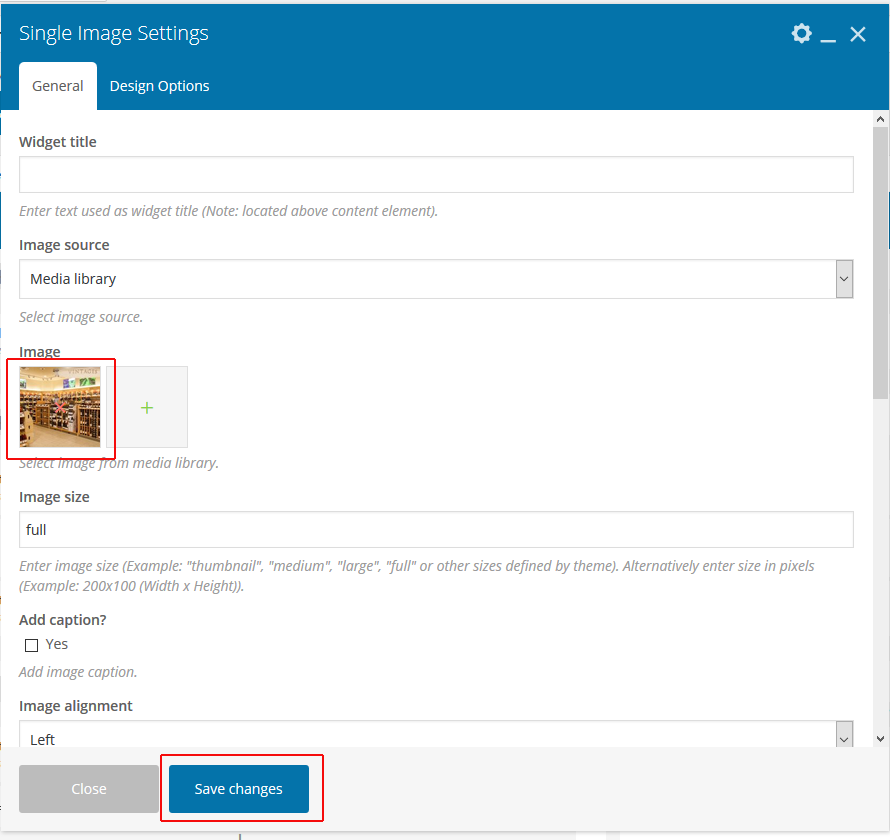
5. Add the store photo: Hover over the Single Image and click the pencil icon that appears on the green popup. Delete the current store photo by hovering over it and clicking on the “x”. Click on the green plus to add a new photo. Upload or select the store photo from the media library and click the Set Image button. The photo size must be 1920 pixels width x 820 pixels height. Please resize the image in either the WordPress built-in image editor (more info here), or in image editing software (eg. Photoshop) prior to adding it to the site. Once done, click the “Save Changes” button.
6. Change the Store Category: Hover over the text “Stores – Amenities” and click the pencil icon that appears on the green popup. Change Amenities to the appropriate store category (eg. Women’s Apparel, Home Decor, Children’s Clothing, Jewellery, etc.). Once done, click the “Save Changes” button.
7. Add Mall Map:
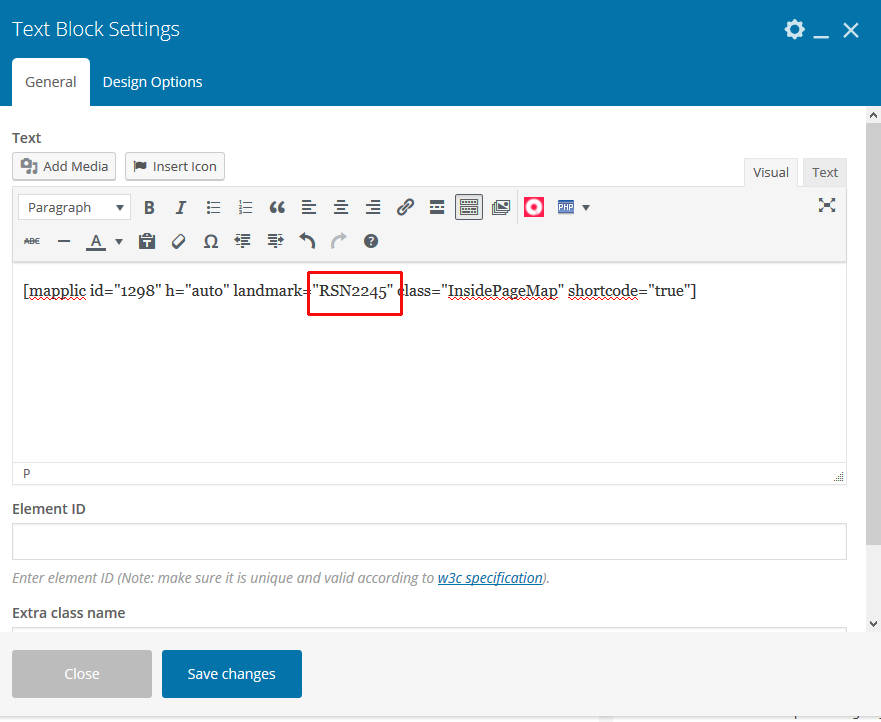
Step 1 – To add the mall map to the page the first thing you need to do is find the landmark code. In a new tab, go to Store Maps > Maps in the left-hand navigation. Click the Edit link to go to your main store map. Once there click on the store on the map and find the RSN number (eg. RSN2245). It will appear in the top-left corner of the map. This is the number that you will need to add to Step 2.
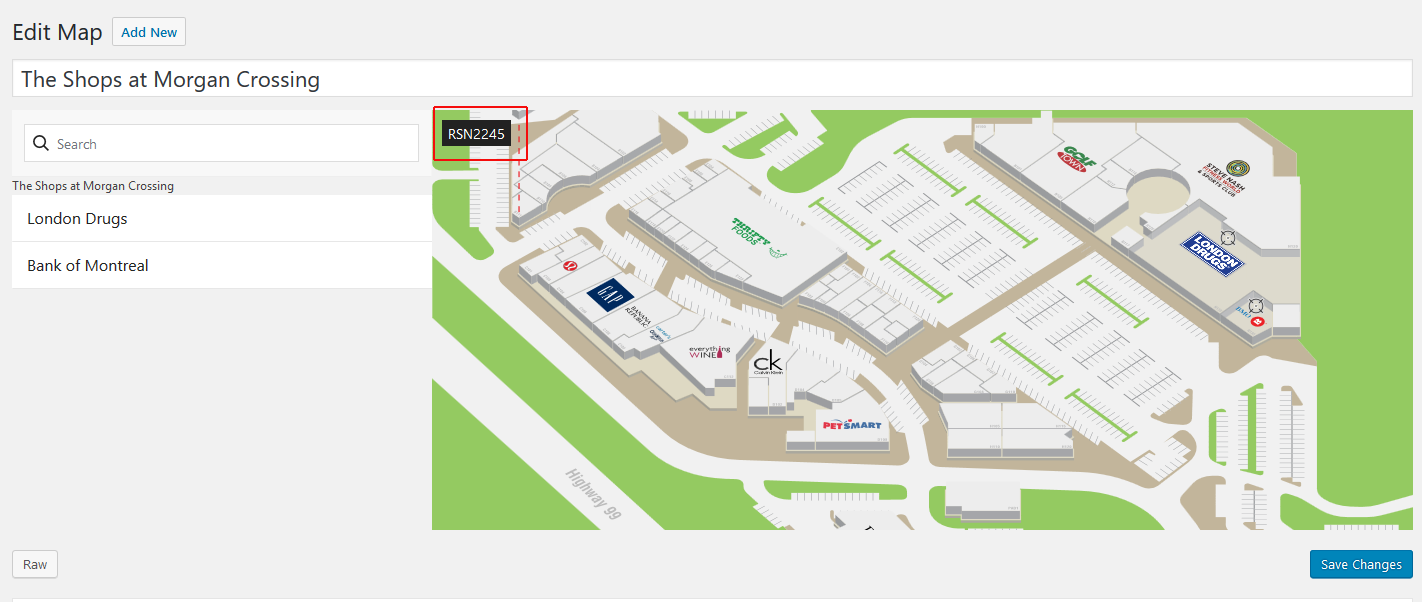
Step 2 – Go back to the Store page that you were editing. Hover over the text box with [mapplic id=…] and click the pencil icon that appears on the green popup. Edit the landmark to the correct store RSN number. Once done, click the “Save Changes” button.
8. Add the store details: In the dialogue box with the store information, update to the correct info. Be sure to add the email link.
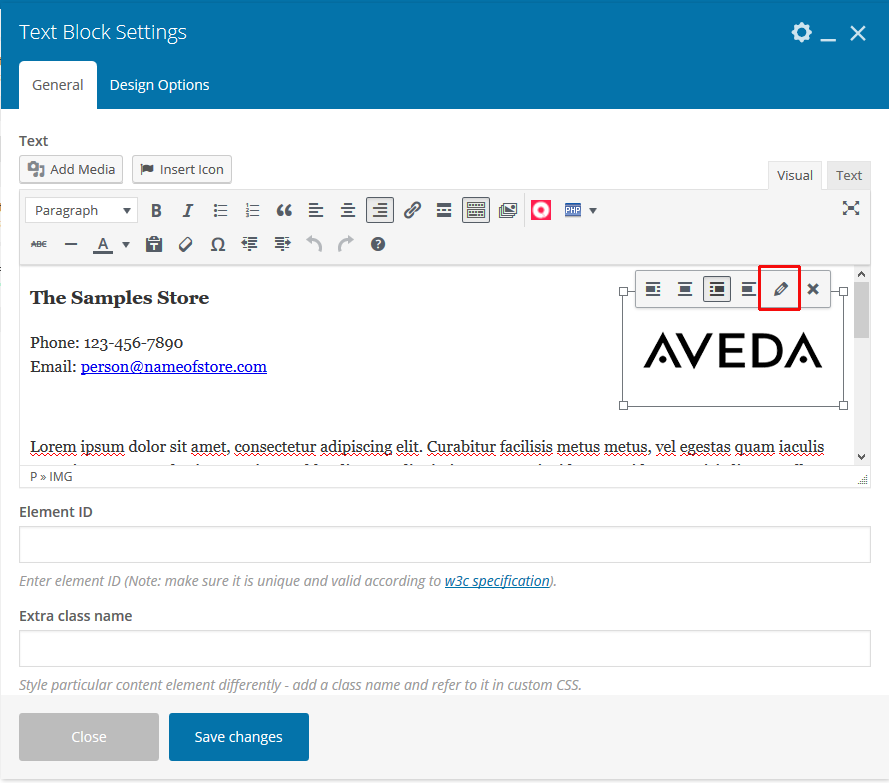
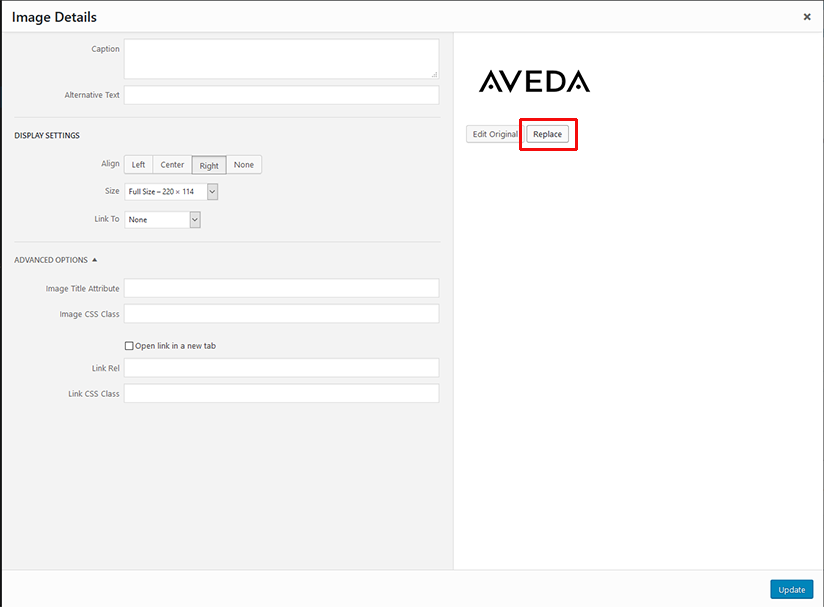
9. Add the store logo: In the dialogue box with the store information, replace the existing logo in the template by clicking on the logo image, selecting the pencil icon, and then in the dialogue box that appears click the replace button to upload/select the new logo. Please note that all logo images should be on a transparent background, and 220 x 114 pixels . Click here for more info on modifying image sizes.
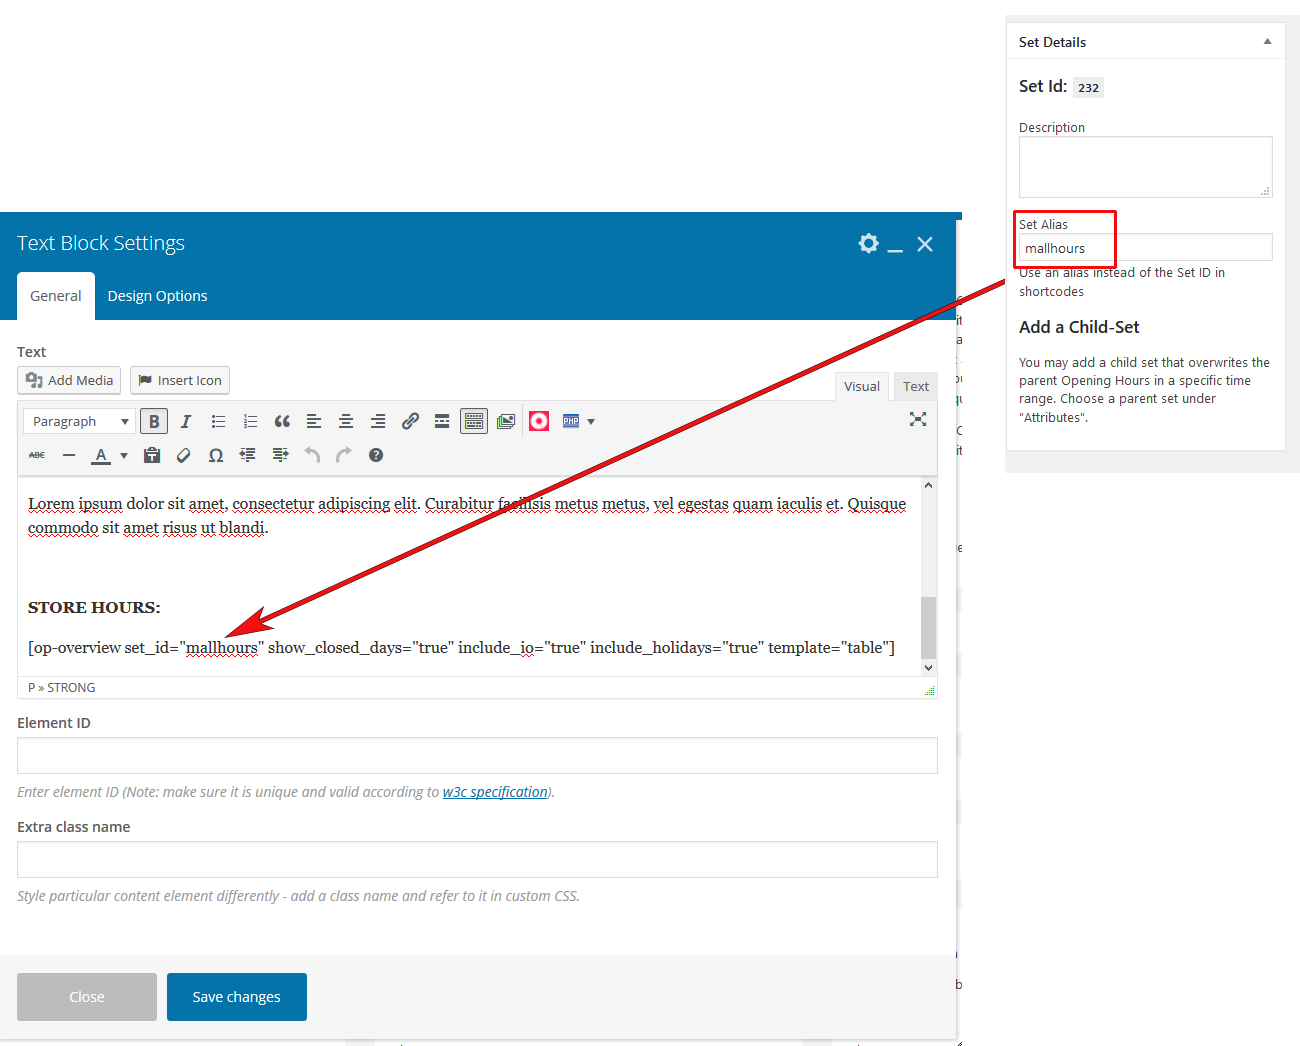
10. Store Hours: If the store has different open hours than the mall, you can add these to the page. For instructions on how to add store hours, click here. Once you have completed the steps to add the store hours, copy out the “Set Alias” you added to the set_id=”” into the shortcode.
11. Once you are done, click the “Publish” button.
12. After you have added ALL your store pages, you should delete The Sample Store so that it doesn’t appear on your site when you go live. Going forward, you can always clone another store to create a new store when needed.